Here’s a fun thing we did a while back that somehow got pushed to the blog’s back burner. Yup, it’s seasonal, but it was really fun and I wanted to share. I’ve been waiting to do this with the kiddo until now because you work with permanent dyes and lit candles. She did a great job.
My sister holds a Pysanky (that’s what you call this) party every year at her painting studio. It’s the perfect space to get down and messy/creative. You can see a great post on her blog here.
You can find all the supplies you need here.
-

- Blowing out the eggs
-
- Black dots are wax plugs.
-
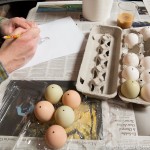
- Draw your design with pencil.
-
- The kit comes with some designs for inspiration.
-
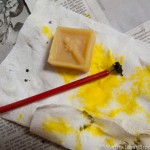
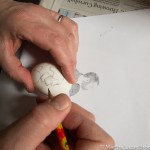
- Tool called a kistka and beeswax.
-
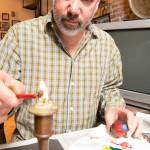
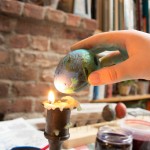
- Heat your kistka over a candle to be able to scoop the wax into it.
-
- Draw with the melted wax that comes out of the kistka.
-

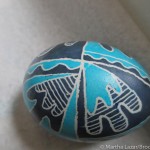
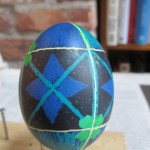
- You can make very intricate designs.
-
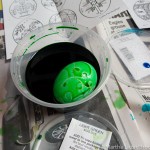
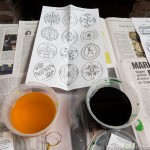
- In green dye. You can see the wax resisting the dye.
-
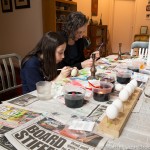
- It’s fun, but messy, so cover your table and floor well.
-
- We had some friends come over for Easter dinner and some egg dyeing.
-
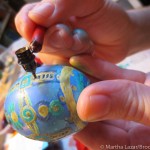
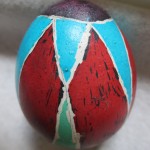
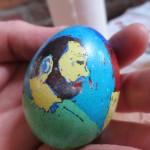
- There are about 3-4 layers of wax and dye on this egg.
-
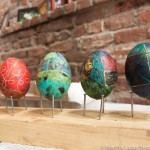
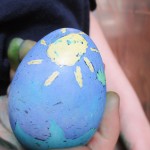
- These eggs are done and are waiting to dry.
-

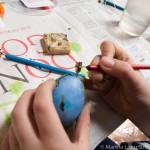
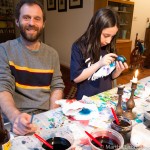
- Filling in some larger areas in wax.
-
- After the eggs dry, hold them up to the flame to melt the wax. Wipe it away and voila.
Lovely!