How to Make Hungarian Crackers (Pogacsa)

goodpuff1

This is a recipe that my father used to make for cocktail parties and was usually one of the first things to disappear. My sister and I seem to often be on the same wavelength and just as I was deciding on making these for Neil’s birthday party, she emailed me to ask for the recipe. She confirmed that hers disappeared immediately, so I thought I would post the recipe with directions on how to make them.

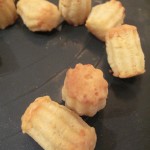
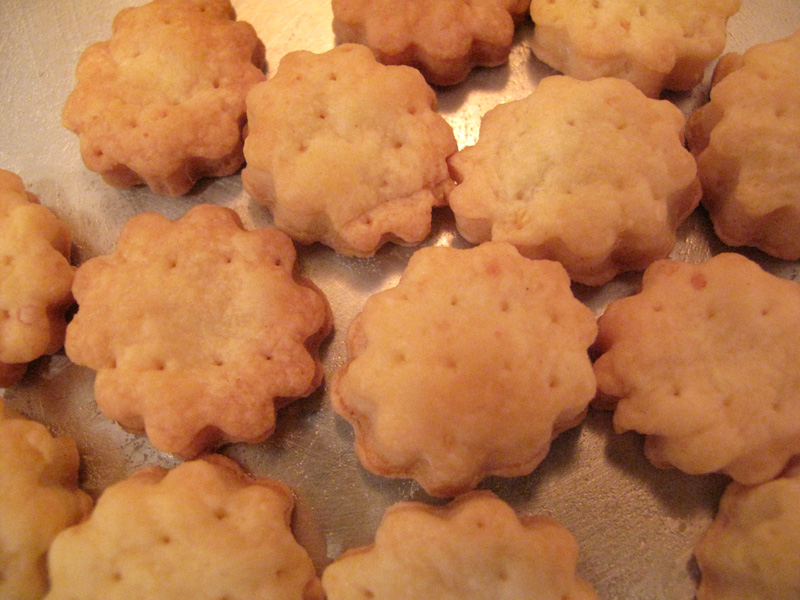
The first batch I rolled out to about 1/4″ thickness, which was *way* too thick. You can see from the photos below that they kind of shrink up sideways and puff upwards. The first batch were freakishly high, so I rolled the subsequent batches thinner (and poked them with fork tines).

Pogacsa (sometimes seen as Pogatcha)

Equal weights of:

flour

butter

cream cheese or feta cheese. I used feta cheese for these. I used 8oz (1/2 lb) measures of each and got a nice sized basket of crackers. Several dozen.

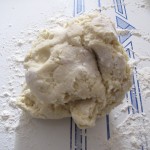
I love Hungarian recipes! They are usually quite simple. Okay, so I mixed the butter and cheese together until it was well-blended. Then I added the flour and mixed it with the dough-hook on my stand mixer. The dough is very thick. You can see the bits of feta in my dough.

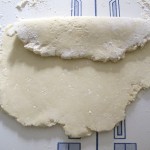
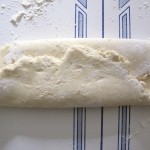
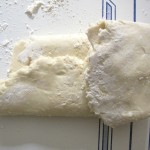
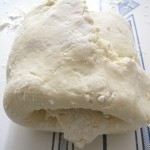
Generously flour a surface and roll the dough out as seen below. You will fold each edge to the center until you have 4 flaps folded in. Repeat this several times and keep it well-floured. The rolling part is very important, otherwise the crackers won’t puff.

Wrap in plastic and let rest in the fridge for about 1/2 hour.

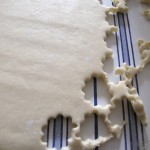
Roll out thinner than 1/4″ (I have photos of the overly puffy crackers. Don’t let this happen to you!) and cut with a small drinking glass or other cutter. I used a canapé cutter, which I think was too small. So about 1 1/2-2″ across. I also suggest poking them with the tines of a fork to keep the puff factor down.

Bake at 350 degrees F for 15-20 minutes until they are golden brown. You can put them directly on the cookie sheet. There’s enough butter in these that they won’t stick to anything!

They are best warm, but are still delicious room temp. If you have any left over you can always warm them up and have with lunch. I only had extras because I had an insane amount of food at the party where I served them.

Turn Down the Heat


A few weeks ago we went to Ikea and bought down comforters. We pay for our heat, which is somewhat unusual here in New York City. We like to keep our house cool, especially at night when we can hunker down under the covers. Our down comforter finally exploded a year ago, so we’ve been on the look out for an inexpensive replacement. At Ikea they rate their comforters on a scale of 6, with 6 being the warmest. Without hesitating, we grabbed a 6 for us and for Lindsay. At $49.99 the price was unbeatable.

I usually go to bed in the winter with ice blocks for feet and warm them up on my poor husband, who we refer to as the polar bear. After the first night of the #6 comforter I was insanely hot and so were Neil and Lindsay. We turned the heat OFF the next night. We were still hot (Lindsay had just gotten nice warm pjs for the holidays) so we went to bed in t-shirts and undies. It made trips to the bathroom in the middle of the night interesting in our no-heat house! I was still too hot. I was downright sweltering if Neil came anywhere near me. For the sake of marital harmony, we decided to get a #4 comforter and try to sell our #6s to friends with cabins or who wanted to hike the Andes. A queen size was $39.99, which was amazing! So far so good. We turn off our heat and we can still snuggle without overheating.

I was thinking about how much this little addition to our family has helped us save energy. I mean, who actually turns their heat off when it’s 20 degrees outside?

Looking around the internet I found some interesting facts that might help encourage you to turn down the heat. A warm comforter is a good first step!!

  • The rule of thumb is that you can save about 3% on your heating bill for every degree that you set back your thermostat” full time, says Bill Prindle, deputy director for the nonprofit American Council for an Energy-Efficient Economy.
  • Try turning down the thermostat 5 to 10 degrees at night, and then turn it up again in the morning when the coffee is brewing. If you can get used to that, you’ll save 5 to 10 percent of your heating bill.
  • It does NOT take more energy to re-heat your house after the heat has been turned down than to keep it at the same temperature all the time. Nor does turning your thermostat up make the house warm up faster — it simply makes the boiler stay on longer before turning off.

Things you can do

  • Close curtains or blinds at night to keep out the drafts.
  • Turn your thermostat down or off at night. You can get programmable ones that will turn the heat on in the morning, so you aren’t freezing when you wake up. Then turn the heat down when you go off to work.
  • Check the seals on windows. We have a huge window in our apartment that is too high to reach. It is single pane glass and the wood between the panes looks brittle. Neil once put plastic up (don’t ask me how he got up there without killing himself) and sealed it with a sheet of plastic. That lasted several years, but has since come down. We rent, so we are at the mercy of a landlord who isn’t interested in fixing the window. We can see things moving in the draft caused by this window.
  • Wear sweaters around the house instead of turning up the heat. Whenever I complained to my father that I was cold, his reply was always to put on a sweater. Makes sense.
  • Put plastic up over windows that leak. There are lots of different plastic coverings that are made especially for this purpose. You stick them around the window and then heat them up with a hairdryer. This causes the plastic to shrink a bit and pull tight. We do that with the window in our home office and it makes a huge difference.

Let me know your ideas for keeping the heat down.

Spinach Pasta

spinach pasta

I had a bunch of spinach in the fridge that was looking a bit limp, so I decided to make some fresh pasta. I have a pasta roller/cutter attachment for my stand mixer, but you could use manual rollers.

Fresh Spinach Pasta

1 bunch of spinach steamed, or 1 package of frozen spinach thawed. Either way, chop up the spinach finely. I tried using a food mill, which wasn’t a huge success. A blender or food processor or determined knife wielder would work great.

3 eggs

2 1/2 cups of flour

I mixed the three ingredients together and added some of the spinach liquid to make the dough form a ball. I kneaded it by machine for 2 minutes and then by hand for another 1 minute. Let the dough rest for about 15 minutes.

Roll it and cut it. Divide the dough in 4 equal parts. Flatten one piece and feed it through the widest opening on the pasta roller and then fold in half and feed through again. Repeat this several times until the dough is nice and supple. I dust it with flour so it isn’t sticky at all. This helps prevent the pasta from sticking together when you cut it. I put each piece of dough through this and then set the roller to a thinner setting. I made fettucini, so I ended up on setting 5 of my kitchen aid roller. It’s a medium setting, which gives it a nice heft when you are eating it. You don’t have to fold the dough in half for the thinner settings – that’s just on the first setting.

I’m going to get some crushed tomatoes and make a simple tomato and garlic sauce. With a little grated parmesan it should be simple and pretty. Ever notice that Italian food and the Italian flag are the same colors? Coincidence? Nah.

What to do with your old Christmas Tree

tree2

After my sister-in-law told us that her 3 year-old son wanted to sleep under his Christmas tree, my husband and I remembered our daughter’s love of our Christmas tree when she was about the same age. When our tree was dry and brittle, we started to break the news to Lindsay that we were going to take it down. She was really upset and kept hugging the tree, which of course just added to the already alarming loss of needles. Every year we take our tree to a local park, where they have a chipping program called Mulchfest. We brought our tree there, much to Lindsay’s skepticism to “be with it’s friends”. She bid it a tearful farewell and fortunately didn’t notice the crew feeding trees into the huge chipper.

tree

I always find it a little sad to see Christmas trees tossed out with the trash. The fact that they were once a treasured part of the holiday and are now tossed out on the street with the garbage bags always startles me. Plus it’s hard to wrap my head around all that organic matter going to a landfill with old batteries, diapers, etc. So, let’s try and come up with some great uses for old Christmas trees to prevent them from going into landfills. TREECYCLE!

  • Find out if your community has a tree collection or chipping program. Here in NYC we have mulchfest this coming Sat. 1/9 from 10am-2pm. You can look at this site to find a park in your area that will take your tree. And while you are dragging your tree down the street, why not stop and grab one or two others that are just lying on the sidewalk waiting for trash pick up? A lot of these programs allow you to bring some wood chips home with you for your garden.
  • If you don’t have a mulching/chipping program in your community, do it yourself. Prune branches off your tree and lay them down in your garden beds. Pine branches can look nice arranged around a tree on a city sidewalk. You can add them to your compost pile, although pine needles can take a while to break down.
  • You can prune branches and make small bundles. These are great to help start fires in your fireplace.
  • If you have the land, drag your tree out into a woodsy area to be used as a wildlife refuge for birds and small animals.
  • If you have a pond, weigh your tree down and put it in the water. It becomes a nice home for fish.
  • If you live near a beach, see if your community uses old Christmas trees in an effort to restore dunes like Bradley Beach in New Jersey.
  • You can save the needles and make potpourri or sachets.

If you have a great use for an old Christmas tree, please post!

Hankies vs. Facial Tissues

hankie1

Last year in preparation for a very sad event, I bought a package of cloth hankies. Since then they have become a staple with me as my nose runs from October through May. I like how soft they are on my beleaguered nose, I like that I’m not cutting down trees to wipe my nose, and I like saying hankie way better than facial tissue. Seriously, what focus group came up with that name? It sounds as ridiculous as “ladies lounge”.

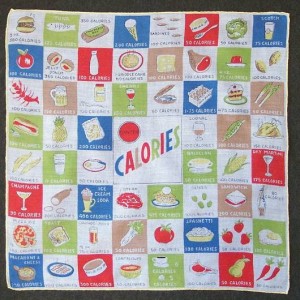
Here are some pictures of adorable vintage cloth hankies. They are easily found in almost any vintage clothing shop for very low prices. Why not try and save a few trees (actually 163,000 if every household used one less box of virgin fiber tissues) and smile when you blow your nose into a hankie that says “Thank you”? These hankies are from an online shop called Betsy Vintage. They are pricey, but so cute!

hankie2

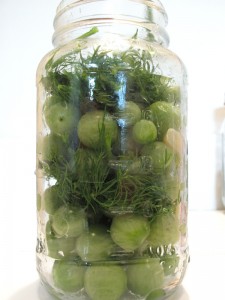
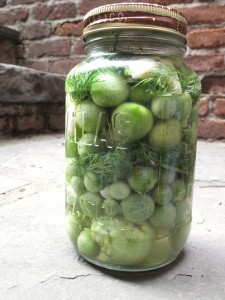
How to Pickle Green Cherry Tomatoes

Just a couple of weeks ago I was commenting on how unseasonably warm it was. Since then we’ve gotten colder with most nights below freezing and the ground feels hard under my feet. Neil wrapped the chicken’s run with plastic to protect them from the cold wind and they are spending a lot of time in their little hoop house instead of the larger (un-wrapped) enclosure.

I had many green cherry tomatoes left on the vine, which I didn’t want to go to waste. I did some searching online and found a few pickle recipes. I decided to make a recipe that didn’t use water-bath canning techniques, which just means that I need to eat them up sooner.

green tomatoes

green tomatoes2

green tomatoes3

Adapted from John Kessler’s Pickled Green Cherry Tomatoes (or tomolives)

1 quart green cherry tomatoes or quartered large green tomatoes

1/2 bunch of dill (about 6-8 stems)

1/2 c. apple cider vinegar

2 t salt

1 t freshly cracked pepper

5 large cloves of garlic, peeled and thickly sliced

Optional: 1-2 hot peppers. I chose not to put them in because of my daughter, but I think it really would help the flavor.

Pierce the tomatoes all the way through with a skewer and then place in a clean quart-sized Mason jar. Add the dill sprigs and pepper.

Bring 1 1/2 c. water to boil with the remaining ingredients. Pour liquid into the jars and cover the tomatoes. Stir the dill and garlic into the tomatoes. Cover and bring to room temperature. Let the tomatoes absorb the flavor overnight in the fridge.

What I would do differently: The original recipe just said to pierce the tomatoes in the stem end. This made 1/2 of the tomato taste pickled and 1/2 taste like a sour un-ripe tomato. After piercing them all the way through, I let them sit another day. I think the longer they sit, the better. These aren’t “officially” canned, so they will go bad. Don’t let them sit around too long. I also thought they could use a little more flavor, so will experiment with the hot pepper next time. I thought they were interesting and definitely a good use for what would have just gone to waste. There are also recipes for friend green cherry tomatoes (cut in 1/2, dip them in some sort of flour or corn meal and then fry), but it seemed as though the breading just wanted to slip off the smooth tomato skins.

Actually I’m really getting jazzed to learn about canning, pickling and fermenting, so I think I’ll try some different pickling techniques next time.