Fallen Fruit

200165320-001

A friend just sent me a great website called fallen fruit. Public Fruit is the concept behind Fallen Fruit, which is an activist art project that aims to map all public fruit trees around the world. They are based out of CA, so most of the mapping is there. When you go to their website there is a pull-down menu. Go to the maps and then click on the interactive online map. What is considered “public fruit” is fruit on or overhanging public spaces such as sidewalks, streets or parking lots. I think I would be respectful of a tree that is obviously in someone’s yard, but otherwise I think the concept is great. Why plant ornamental trees that aren’t even native species, when you could feed hungry people and wildlife?

In addition to mapping fruit trees, they are planning fruit parks in under-utilized areas. 

I love this idea and think that everyone should spread the word and add pin points onto their interactive fruit map.

Milwaukee to use cemetery greenhouses for food production

Here’s an interesting story about an organization called Growing Power in Milwaukee teaming up with Forest Home Cemetery to produce food for city residents. Once you get beyond the zombie images, it’s a very nice partnership. The historic cemetery has 3 century-old greenhouses that used to provide flowers, plants and trees for the park-like cemetery. The cost of heating the greenhouses became prohibitive and they were closed about 10 years ago.  

As the article mentions, urban farming is all about finding places to grow food that people wouldn’t have thought of. It sounds as though the cemetery workers are excited about having something positive and life-affirming happening at the cemetery. Soon school groups will not only tour the historic cemetery, but they will also tour the greenhouses and learn about planting and growing food.

I love stories like this. People thinking creatively. People working together. Healthy food going to people who might not otherwise get it. What a great partnership.

Care for your urban tree

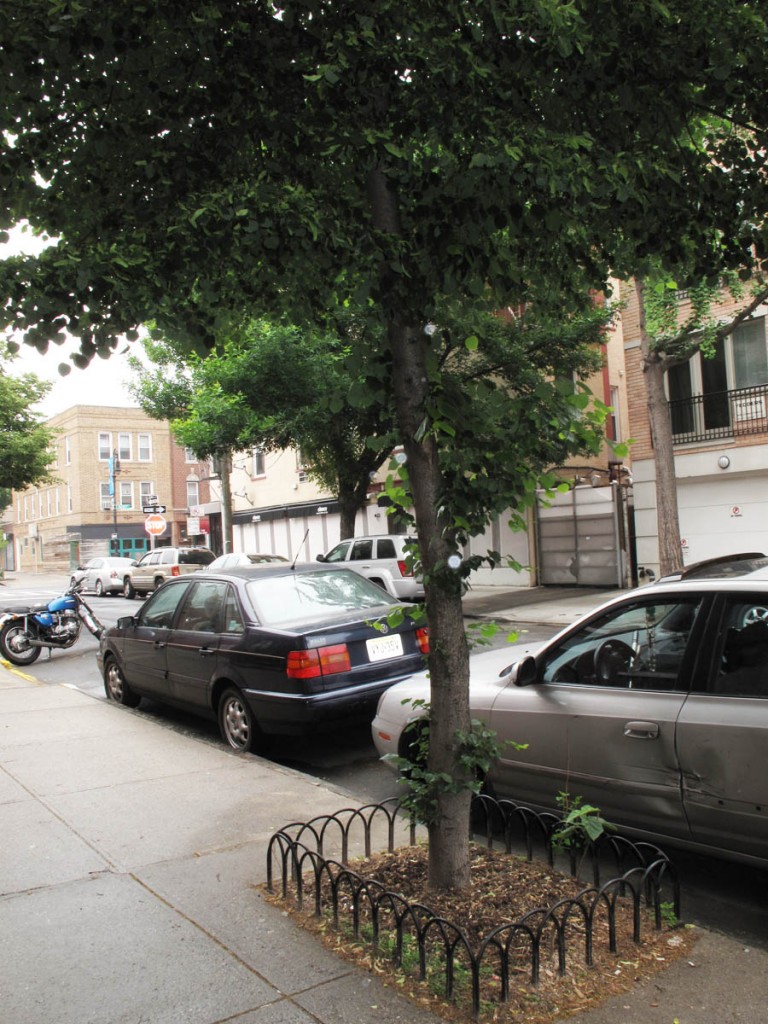
A lot of trees have been planted in my neighborhood lately. It is a part of MillionTreesNYC, which is an initiative with NYC Parks and New York Restoration Project. They aim to plant 220,00 street trees, 380,000 trees in parks and 400,000 will come from private organizations and homeowners.
street-tree

We have a little tree outside our apartment building and I was inspired by seeing all of these new trees to take better care of it. I started by dumping several buckets of worm-filled compost in the pit around the tree. When I watered it, the water just ran off the compacted soil. So I figured I needed a better idea of how to care for my urban street tree. I found some great information on the NY Parks and Rec site as well as the Brooklyn Botanical Garden’s Greenbridge site. Below is a summary of what I learned.

1) Loosen up the soil- With a hand cultivator (the hand tool that looks like a 3-pronged claw, loosen up the top 2-3″ of soil. Most city tree soil gets compacted, which prevents water and air from reaching the roots. Dig up any weeds that will compete with the tree for nutrients.

2) Flush the soil- In the spring, water the tree well to remove road/sidewalk salt that might have accumulated. Also try and keep animals out as much as possible. Dog urine can throw off the soil nutrients and burn the tree trunk. 

3) Amend the soil- Add a 2-3″ layer of mulch around (but not touching) the tree. The mulch is great at preventing weeds, keeping the soil below it moist and slowly breaking down into nutrient-rich compost. The mulch looks nice and lets neighbors know that you are taking care of your tree. In other words, it might deter people from tossing their trash in your tree pit.

4) Water your tree- The area around a tree that allows water in is quite small for the amount of water a tree needs to flourish. Water newly planted trees about 10-15 gallons a week. Mature trees need about 8-10 gallons a week during periods when it hasn’t rained. 

5) Plant flowers- You need to be careful not to harm the tree when you plant around it. Digging in the pit can damage roots. Raising the soil level against the tree’s trunk can cause it to rot or prevent air from reaching the roots. However, you can plant flowers or plants with shallow roots that won’t disturb the tree. Brooklyn GreenBridge recommends: small annuals like impatiens, or perennial groundcovers like bugleweed (Ajuga reptans) or periwinkle (Vinca minor)—avoid ivy. Small bulbs are good too: try crocus, miniature daffodils, or glory-of-the-snow (Chionodoxa species). 

An urban tree has a lot stacked up against its survival – air pollution, car doors, dog pee, bicycles chained up to them as well as limited space for them to grow and get their water. Any help we can give them will help them to thrive.

How to make yogurt

I’ve been reading my daughter the Little House on the Prairie books lately. What amazes me when I’m reading them is how many different skills people had back then. They raised animals, they built houses out of trees, they gathered honey from hollow trees, they made cheese, soap, maple syrup, beds, clothes, you name it. It seemed as though there was almost nothing they couldn’t do to meet their needs. It seems now that there is almost nothing we can do to meet our needs. Okay, computers, heat, cars and all of that are fantastic inventions, but we’ve become so specialized that things that a child could do during Laura Ingalls’ time seem exotic to us now.

Take cheese making for instance. How many people know how to make their own cheese? Maybe there isn’t enough incentive now that wonderful, artesian cheeses are available in every decent-sized town. We have a great cheese shop in our neighborhood called Stinky. But I digress.

Almost a year ago I started to read up on making cheese. I found the New England Cheese Making Supply Company online and promptly ordered a cheese making kit. They teach you how to make fresh mozzarella in 30 minutes. I tried it and it was delicious. I decided to try yogurt and discovered this site. He errs on the side of caution with heating the milk up, but I decided I would try his method and then I could always scale things back when I was more comfortable with the process.

So let’s make yogurt!
You will need:
1 gallon of milk
1 8oz. container of yogurt that’s unopened
powdered milk (optional)
a big stock pot
enough jars (mason, spaghetti sauce) to hold the gallon + of milk
cooler

• First you want to steam the jars you will be using for about 10 minutes to sterilize them.
• Add a gallon of milk (not ultra pasteurized!) to a big stock pot (with a heavy bottom). You can make your yogurt full fat or lowfat by choosing what kind of milk you use. You can add 4 T of powdered milk to make a thicker yogurt.
• Heat the milk slowly until it reaches about 185-195ºF.
• Place the covered pot in a pan of cold water to cool it down. Again, some people skip these first steps, but this kills any pathogenic (euw!) bacteria that may be hanging around.
• When the milk cools to 122-130ºF, remove it from the cold water bath. Pour 1 cup of the milk into a 2-cup measure.
• Add 1 cup of fresh yogurt until mixture is well-blended.
• Slowly add your yogurt/milk mixture into the rest of the milk and mix well.
• Pour milk mixture into the sterilized jars and cover immediately. One of your jars can be an 8oz. jar that will serve as the fresh yogurt for your next batch.
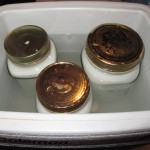
• Add water that is about 122-130ºF to the cooler. Set the jars in the cooler. The water should be below the level of the lids. Let the jars sit undisturbed for at least 3 hours. If you don’t have a cooler, you can wrap the jars in towels and keep in a warm spot.

Your unopened jars will keep for up to 2 months in the fridge, so you have plenty of time to enjoy this delicious yogurt.

Test Your Soil

The soil in my backyard has always been disappointing to me. I don’t think I could ever produce enough compost to turn this dust-like soil into a beautiful loamy soil. Most soil in Brooklyn is considered sandy. When it rains, the water runs through the sandy soil very quickly. It drains a little too soon, which means that the soil is often quite dry. Sounded like my soil, so I thought that’s what I had.

Then I took the Water Garden class at the Brooklyn Botanic Gardens and the teacher mentioned different soil types: sandy, clay, silt (the ideal) and rubble. Wait a second! What? Back before people were a little more enlightened, they used to just tear down a building and leave the rubble behind. They would throw some soil on top, and voila, their problem was buried. I mentioned to the teacher that I’ve been picking bits of broken glass and tile out of my soil for the past 15+ years. Every time it rains, there are little sparkly bits that have surfaced. Well, guess what? Turns out I have sandy, rubbly soil. Wonderful. More reason to keep composting.

So now that I’m trying to raise more veggies than flowers, I’ve been thinking about how safe my soil is. Do I have a lot of lead or other heavy metals in my soil? I sent a soil sample to Cornell Nutrient Analysis Lab to be tested. I’m having them test for general soil fertility and heavy metals. Here’s an article in the NY Times today that specifically mentions Brooklyn as having high levels of lead in the soil. My teacher at the Brooklyn Botanic Gardens said airborne lead is more of a problem than lead in the soil. I guess the urban plants have a good chance of getting the lead from either end.

The Times article says that fruiting crops such as tomatoes, squash, eggplant, corn and beans don’t accumulate lead as much as herbs, leafy greens and root vegetables. It also said that you can grow indian mustard and spinach for a few years as a way to leach lead out of the soil. Obviously you can’t eat those greens and they say you need to dispose of them as toxic waste. Yikes.

I think a very good solution is to have raised beds or containers. That is pretty much what I have. I have herbs in an area that has only composted soil. Everything else is pretty much in pots. I might add a raised bed in an area that gets a bit of sun to grow more greens than I’m able to at present. I’m enjoying the veggies so much that I’m crossing my fingers that my soil passes it’s test.

The Story of Stuff

217x188_sos_banner007

Take a look at this 20 minute video about the downside of our production and consumption patterns. Annie Leonard narrates the video and discusses the social and environmental problems with the current system of consumption. It’s animated and friendly, so you aren’t left completely depressed. There is also a section on the website called Another Way. It shows 10 little and big things you can do to promote sustainability. Take a peek.

Scrawny asparagus

asparagus stalk

asparagus stalk

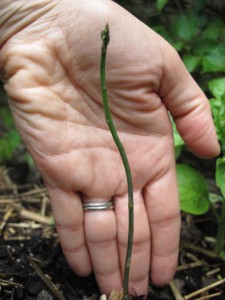
I bought what was advertised as 2-year asparagus crowns this spring with visions of tender fresh asparagus in my head. I was not prepared for these pathetic hair-thin stalks to grow out of my soil. I think I was conned. They look like first year stalks to me. If you look at this video, you can see stalks of different years. I’ve been suckered, which means I’m going to have to wait at least another year or two to be able to harvest them. They need to grow to nourish the crown. If I got impatient and cut them this year, the whole plant will probably die. Bummer.

My friend Stephanie went to visit a friend of hers and blogged about her asparagus. Now I have asparagus envy.

Dragonfly, A Farm for Urban Agriculture

Vincent Callebaut Architectures have designed what they call a metabolic farm for urban agriculture to be built on Roosevelt Island in New York City. It is called Dragonfly because it’s form is based on the wing of a dragonfly.

The building would offer housing, offices, laboratories in ecological engineering, vertical farming spaces that can be cultivated by its inhabitants.

In their own words:
Floor by floor, the tower superposes not only stock farming ensuring the production of meat, milk, poultry and eggs but also farming grounds, true biological reactors continuously regenerated with organic humus. It diversifies the cultivated varieties to avoid the washing of stratums of soft substratum. Thus, the cultures succeed one another vertically according to their agronomical ability to provide some elements of the ground between the essences that are sowed and harvested. The tower, true living organism, becomes thus metabolic and self-sufficient in water, energy, and bio-fertilizing. Nothing is lost; everything is recyclable to a continuous auto-feeding!

And it looks so freakin’ cool!

Creating a Rain Garden

columbine

columbine


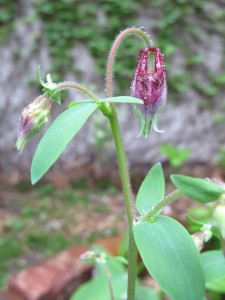
Last wednesday I took a class entitled Creating a Rain Garden at the Brooklyn Botanic Gardens. It was a free class through their community horticulture program called GreenBridge. I hesitate for purely selfish reasons to talk about them, because they offer the most amazing classes free of charge and they fill up very quickly. Okay, there, I did it. You should definitely check out their classes. They have composting workshops, container gardening workshops, seed starting, etc. I will be taking their Edible Landscape class in June. I think all of the classes for the spring are filled up at this point, but you can get on their mailing list for future classes.

At the start of the class, we took a walk through the gardens. We walked through the cherry esplanade, which was in full bloom. The garden was closed to the public, so we were alone there at dusk. We passed through the lilacs and their perfume lifted me off my feet. We then walked through the native plant section of the garden, which is a nice, private section of the garden. There were lots of bunnies out and Robin, our teacher, said that there are wild dogs in the garden that come out at night, but are very shy. The walk was magical and now I have to figure out how to get a job there!

So what is a rain garden? A rain garden is designed to soak up rain water, especially from roofs, driveways, patios, etc. They look like a regular garden, but help to prevent valuable water from running off to the sewer system. You chose a site that has a slight downhill grade, or you dig a small depression that encourages the collection of rainwater. Many communities plant rain gardens in the green space between the sidewalk and the street. They cut the curb in front of the garden, which allows the rain running towards the storm drains to water the garden. If that isn’t clear, here is an example, which gives instructions as well.

One important thing to note about rain gardens is that they aren’t ponds, and therefore won’t attract mosquitoes. Sometimes they are filled with water after a rain, but other times they are dry. This requires plants that can handle both wet and dry conditions. That brings me back to one of my favorite topics…native plants! Native plants thrive in your area, which means they are adapted to live with the weather you get. (ie. temperature and rainfall) Once they are established, you won’t have to pamper them as you do with exotic species. You also have the added benefit of attracting loads of wildlife to your garden in the form of butterflies, bees and birds. And probably my personal nemesis the squirrel.

Okay, back to the rain garden…Think of the garden as a bowl, or as my teacher said, a pie plate. In the center of the garden, which is the bottom of the depression, you will collect the most water. You will want plants that can handle wet conditions. On the edges of the garden, there will be a slight incline, so the conditions will be dryer. You pick different plants for the dry conditions. Here’s a list of native plants that thrive in the different conditions in NYC. Actually these plants would be appropriate for most of the Northeast.

solomons seal

solomons seal


By the end of the class, I realized that I wouldn’t be able to handle the quantity of water that runs off my roof when it rains, so I’m going to concentrate on planting more native plants that require less watering. I think I may also plant around the tiny tree in the pit outside my apartment. Right now there’s just dirt around it. Other people could think about green roofs as a way to absorb rainwater and prevent runoff.

Here are some factoids to encourage you to think about rain gardens:
* In the summertime 40% of our water use goes to watering lawns and gardens. Rain gardens rely soley on rain, so they don’t waste valuable resources.
* Rain gardens allow 30% more water to soak into the ground than a regular lawn.
* 300 million gallons of sewer overflow (rain runoff mixed with good old regular sewage) are diverted to the Gowanus canal each year. Other overflow goes to Orchard beach, Jones beach and others, causing them to close due to unsafe bacterial counts. Euw!

Getting started: What you need to grow vegetables

The following article was on newsday.com today
by Jessica Damiano | Garden Detective

Planting your own vegetable garden can really save money. And that’s not just my opinion; the U.S. Department of Agriculture concurs, estimating that every $100 spent on vegetable gardening yields $1,000 to $1,700 worth of produce.

Expect to harvest about a half-pound of edibles from every square foot of garden, according to the National Gardening Association. That means a 15-by-15- foot garden can produce more than 100 pounds of vegetables.

Supplies: Hoes, rakes, spades, hoses and a fluorescent light kit for indoor seed starting are practically one-time purchases. When spread over their lives, their costs become negligible. Assuming you don’t buy any fancy composting bins, raised-bed kits, greenhouses, cold frames or other high-end gear, growing your own can be quite the miserly endeavor.

A $70 investment in seeds and supplies can yield, on average, a $600 return, assuming a $2-per-pound market price for produce, according to the National Gardening Association. All you really need are seeds and seed-starting mix, containers to start the seeds in (be creative and recycle yogurt containers and egg cartons), fertilizer, compost, water and mulch. It’s late in the season to be starting seeds indoors, so if you haven’t, buy nursery-grown starter plants for this year.

Time: Plan to spend 30 to 40 minutes a week tending every 100 square feet of garden. That’s about 10 minutes a day, plus time for watering.

Sun: When it comes to sun and vegetables, more is better. Locate your garden where it will receive at least six hours of full sun each day, especially if you’re growing the plant for its fruit or root. If you don’t have a site that offers full sun all day, no worries. Just stick to green leafy vegetables like lettuce, collard and mustard greens, Swiss chard, spinach and kale. Broccoli, cauliflower, peas, beans and beets can handle a little shade, too. Herbs require full sun. And always transplant seedlings outdoors on a cloudy day.

Soil: Before you do anything else, dig down 4 to 6 inches into your planting bed and scoop up a cupful of soil for a pH test. You can do this yourself with a store-bought test kit or you can bring a sample to your county Cornell Cooperative Extension office, where they’ll test it and provide specific instructions on raising or lowering the pH and give suggestions for improving the soil. The optimum pH level for vegetables is between 6.2 and 6.8. For herbs, it’s 7.0.

Next, clear the bed of weeds and enrich the soil. Add lime or sulfur if indicated by your pH test results (lime raises alkalinity, sulfur reduces it). Spread 4 inches of compost – the best organic matter available – on top of the soil and till it 6 to 8 inches deep.

If you’re planting in a newly created bed, incorporate 3 pounds of 5-10-5 or 10-10-10 slow-release fertilizer per 100 square feet. If you’re using the same bed you planted in (and fertilized) last year, mix in 2 pounds per 100 square feet. Herbs generally don’t need fertilizer.

Space: Vegetables planted in wide rows perform and produce much better than those that are crowded together. Ideally, rows should run north to south for best sun exposure, but don’t sweat it if that isn’t possible. Transplant starter plants or seedlings exactly as deep as they were growing in their pots. Only tomatoes can, and in fact, should, be planted deeper; they send out roots from the buried portion of their stems that actually make for sturdier plants.

Mulch: Even though it makes the garden look nice and tidy, mulch isn’t purely decorative. Its real purpose is to discourage weeds, maintain even soil temperature and retain moisture. Apply 2-3 inches around plants. Consider shredded bark, wood chips, salt hay or black plastic sheeting.

Water: Most vegetable plants require one inch of water per week. Set an empty tuna or cat-food can into the garden to catch and measure rainfall, and gauge supplemental irrigation accordingly, timed for early mornings to avoid fungal diseases. It’s better to water very deeply once or twice a week than to water just a bit every day, which results in shallow root systems. Use soaker hoses to water the soil, not plants, as sprinklers and overhead watering can lead to fungal diseases.