Early Foraging

5-3 foraging-3This past weekend Neil and I went out with the NYMS for a morel hunt. The spot is about an hour and change outside of the city. You have to be a member to get directions to this spot!

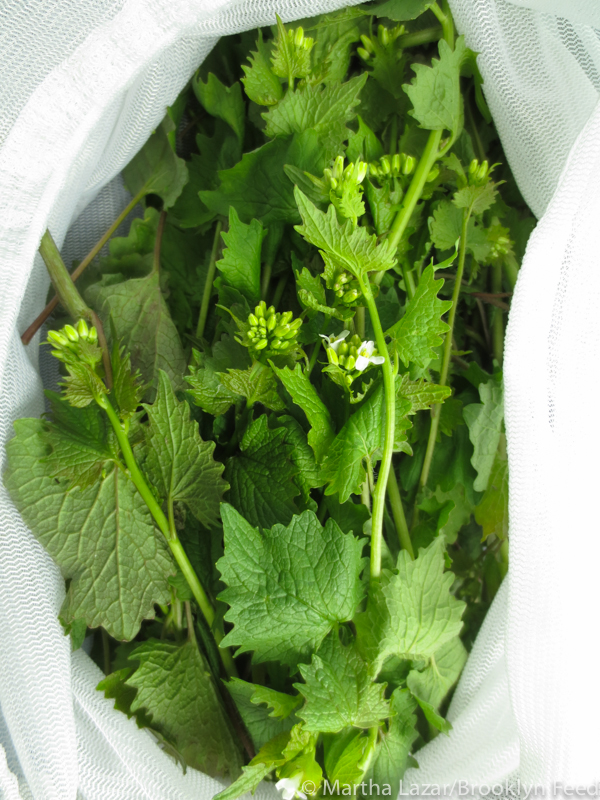
There wasn’t a morel in sight. It seems as though this hard winter we’ve had has pushed the morel season back a couple of weeks. Not wanting to go home empty handed, I collected a big bag of garlic mustard and some japanese knotweed.
5-3 foraging-4

Garlic mustard is a terrible invasive plant, so you are doing everyone a favor by picking as much of it as you can. Forager’s etiquette (not over harvesting native plants) does NOT apply in this case. Garlic mustard leaves are at their tender best before the plant blooms. As with all foraging, please consult a guidebook for identification of plants!

I wanted to make pesto with the greens and followed a recipe I found on a fellow forager’s site. Against my better judgment I used walnuts instead of pine nuts. The whole batch came out too bitter. Unfortunately I don’t think it’s usable.
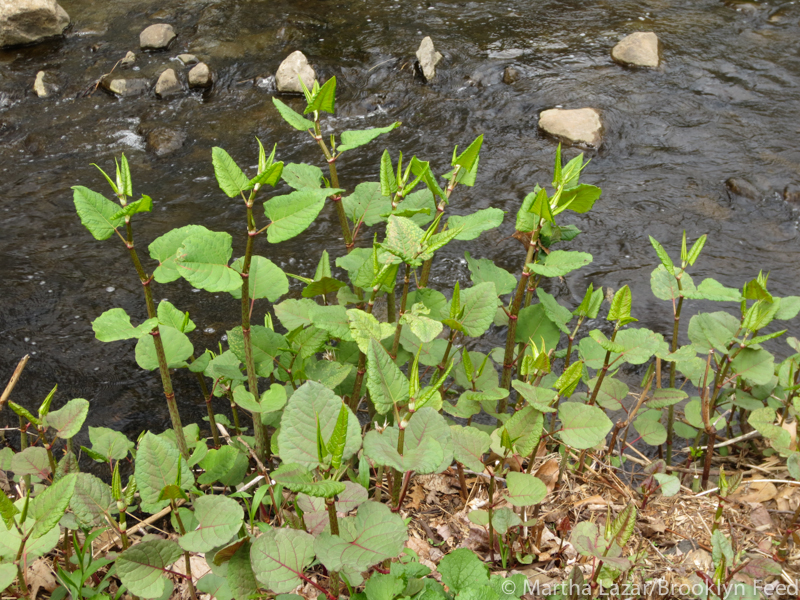
5-3 foraging-5Japanese knotweed is good right now. It is also terribly invasive. Large bamboo-like stands grow up on the side of streams, roads and in disturbed areas.

The shoots are quite tender at this time of year, so don’t require as much peeling as the older/larger stalks do. Knotweed can be substituted for rhubarb in recipes.
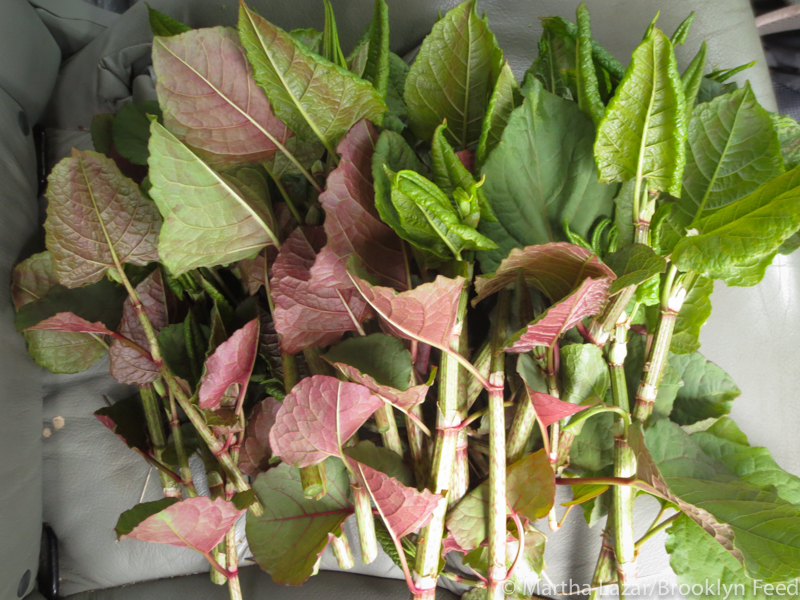
5-3 foraging-6I decided to wait on making the japanese knotweed into anything as I read it freezes well. And because my pesto was such a stellar failure. I washed it carefully as it seems to attract large numbers of ants.5-3 foraging-7
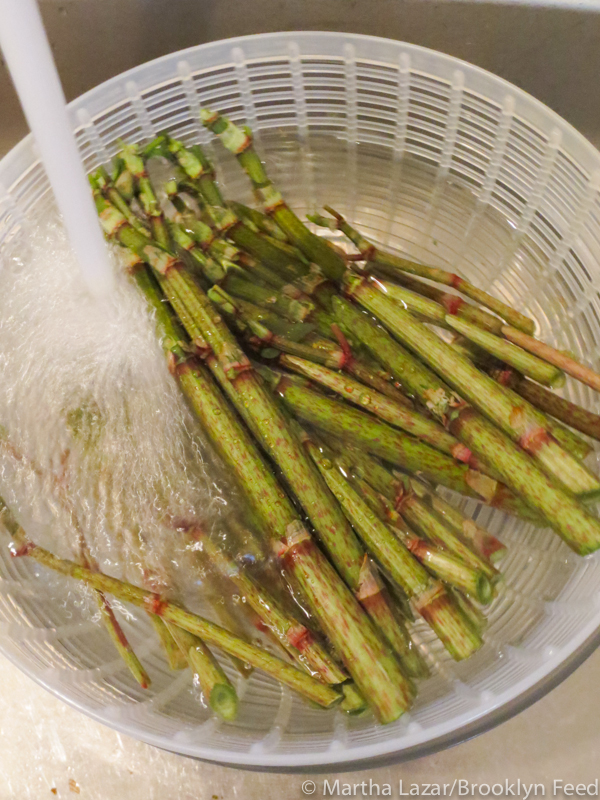
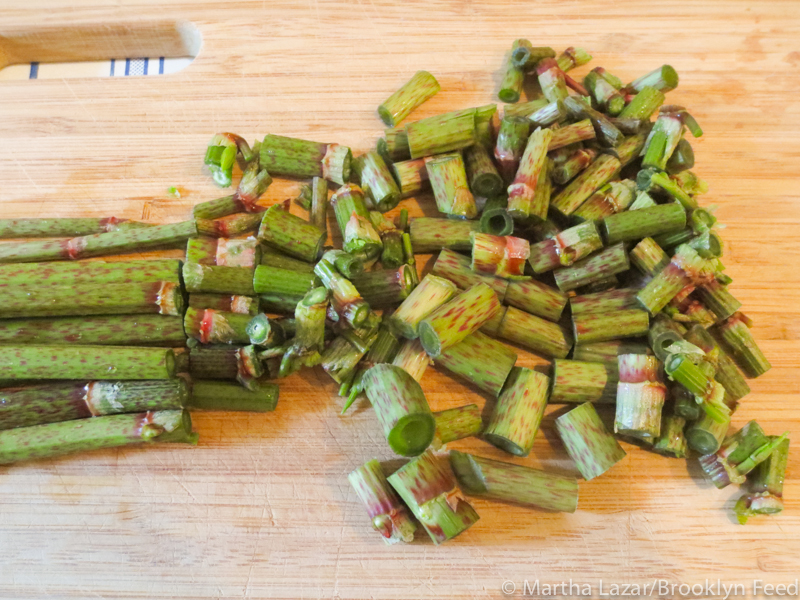
Strip off the leaves and chop into 1″ pieces. Then freeze.5-3 foraging-8
Although we didn’t find any mushrooms, there were still plenty of lovely natural things to look at. We saw crows chasing a great horned owl out of its tree. 5-3 foraging-1
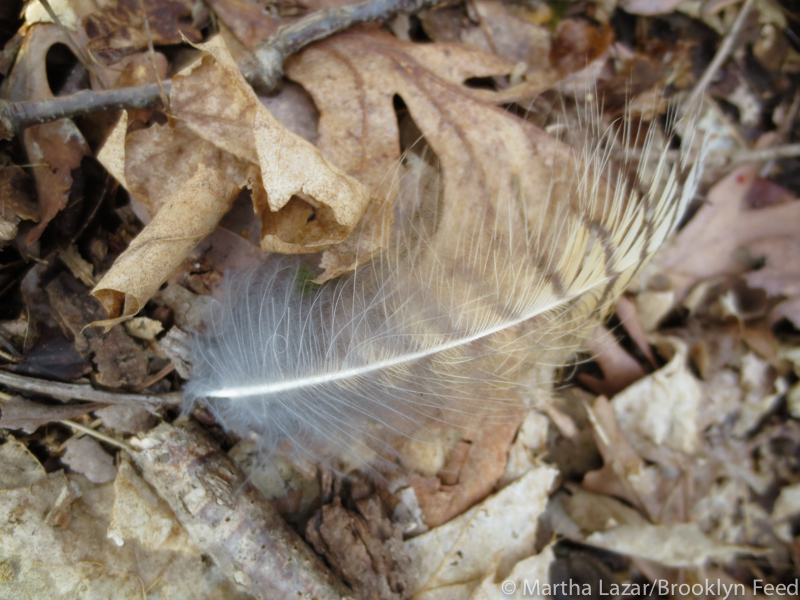
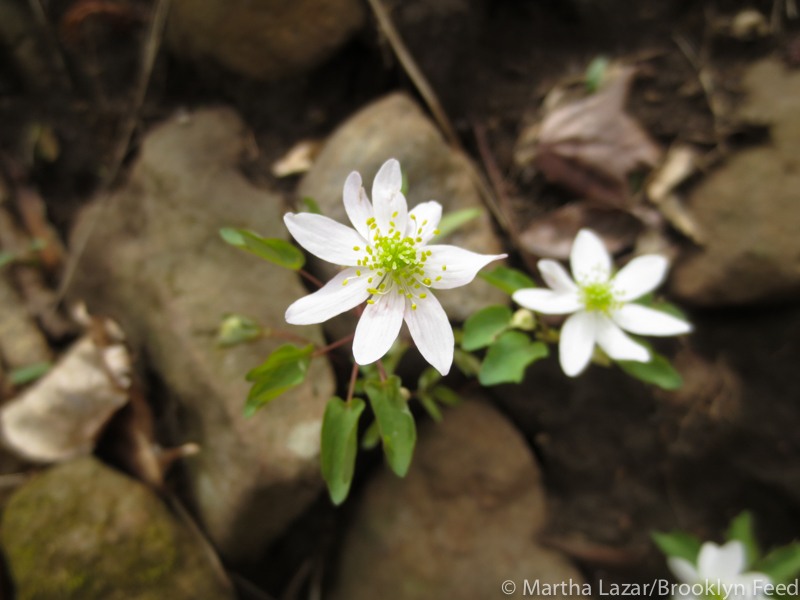
Beautiful spring ephemerals were blooming. 5-3 foraging-2
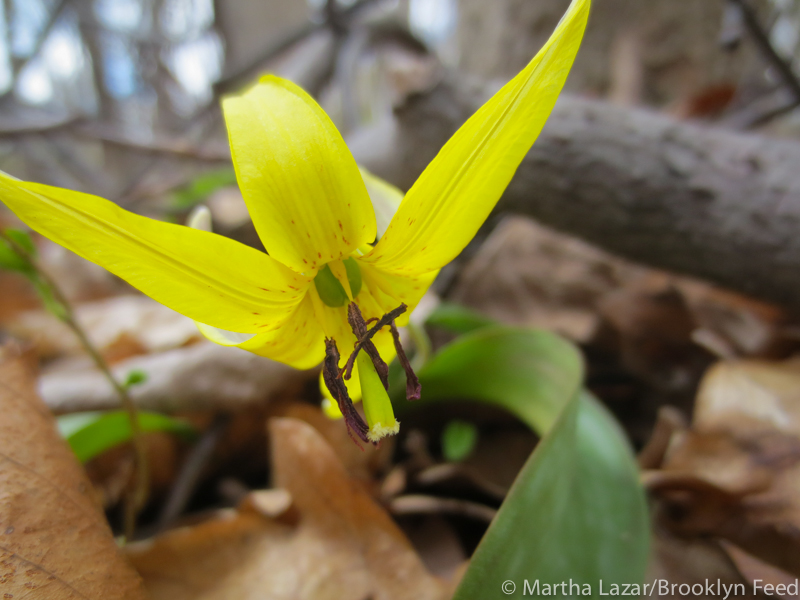
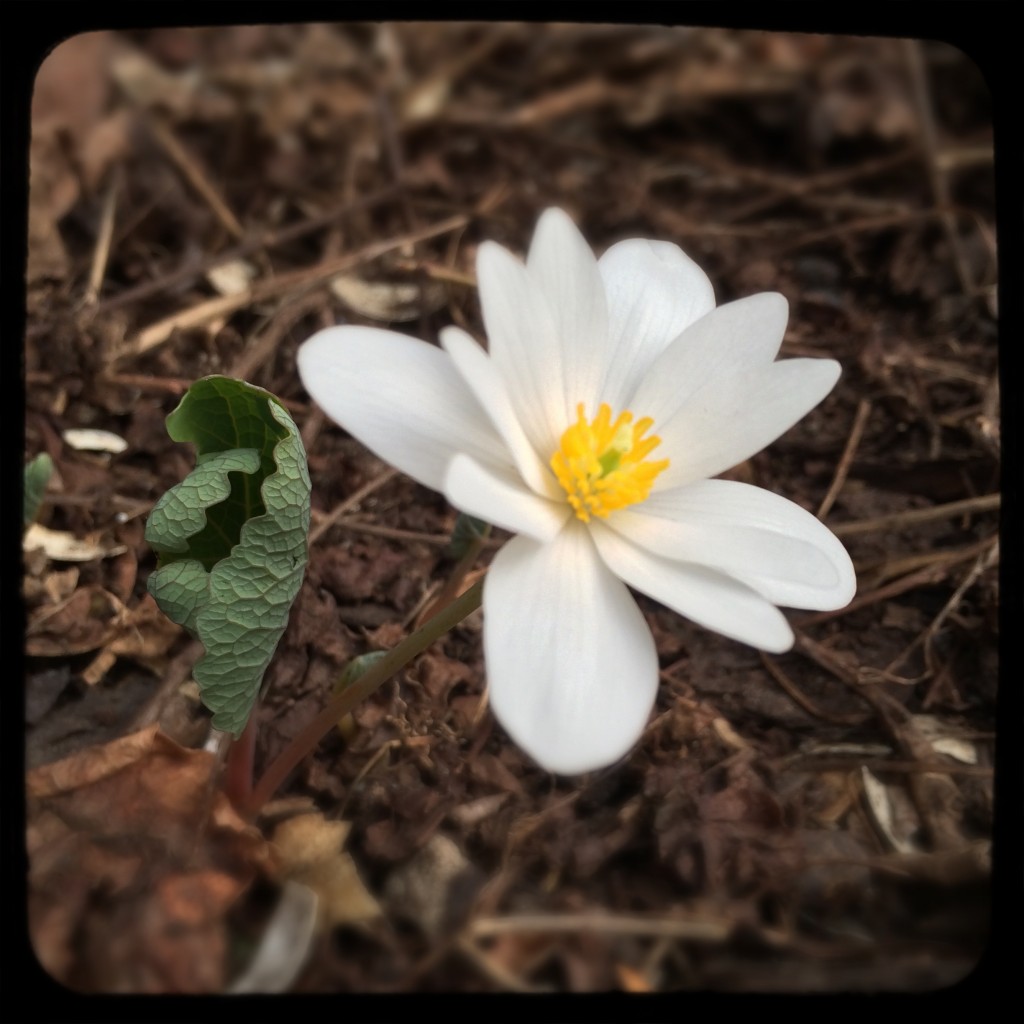
Bloodroot

IMG_1The first flower to bloom in my garden this spring is bloodroot. I got this native plant from my favorite plant nursery Project Native in Great Barrington, MA. My first encounter with this sweet flower was on a hike in early spring a couple of years ago up in the Berkshires. Although spring was definitely hitting, it was still too early for anything more than buds on the trees. As we walked along, we spied lots of these beauties popping up. They just screamed spring. There was something so hopeful about this flower springing up out of what still looked like winter. I was smitten.

I bought a plant a few years ago. Last spring was to be the first time I would have bloodroot in my garden. Unfortunately I let my chickens loose in the garden and they ran right to that spot and danced a cha cha on the plant and shredded it beyond repair. I was afraid that they had killed it. Needless to say, I didn’t see a flower that year.

On my early spring rounds of the garden, when I’m searching for any signs of life, I noticed the small curled leaf of the bloodroot plant! A couple of days later the little flower opened. Isn’t it lovely?

Bloodroot (Sanguinaria canadensis) is so named because of the dark red of its root. It has been used medicinally for ages. Applying the root directly to skin, kills the cells, which has led people to try and use it as a way to kill cancer cells. It is currently added to toothpaste and mouthwash as an anti-placque and antibacterial agent.

Bloodroot grows in part shade to shade. It prefers woodlands. I have it in a particularly shady spot in my garden. It already looks as though it is spreading, so hopefully a few more blooms will pop up this spring. After it is pollinated, the petals drop off and a seedpod forms soon afterwards. I’m looking forward to seeing the whole process this year.


Crocus Sativus, part 2

crocus


I thought I would add a bit to my last post. Above you can see the saffron crocus in bloom. Those 3 crazy stamens you see are what is harvested and dried to make saffron. They kind of scream for attention, don’t they?

Backing up to the last post….after eating the paella I started thinking about the spice saffron. I knew it was the dried stamens of a particular crocus, but that was about it. And what really got me thinking was…with crocus bulbs bursting up in practically everyone’s backyards, couldn’t a saffron crocus be grown here as well?

I poked around the internet as I am wont to do, and found out a few things. The first was that the saffron crocus was actually called crocus sativus. From there the information was pretty easy. I found a bunch of nurseries that stocked the bulbs. You can get them via Amazon for goodness sake.

They grow in zones 6-8 in mostly to partly sunny spots. I couldn’t quite figure out why nobody grows these guys, especially given the exorbitant price. It is the most expensive spice in the world according to many different sources. What got me really thinking about trying it out was this article on it. The author talks about how common the saffron crocus was in Pennsylvania Dutch families, and how they might laugh at how much people spend on the spice when they had them growing next to their wood pile. Somehow that clinched it for me. Here’s another article about the Pennsylvania Dutch connection along with a recipe for chicken soup with saffron.

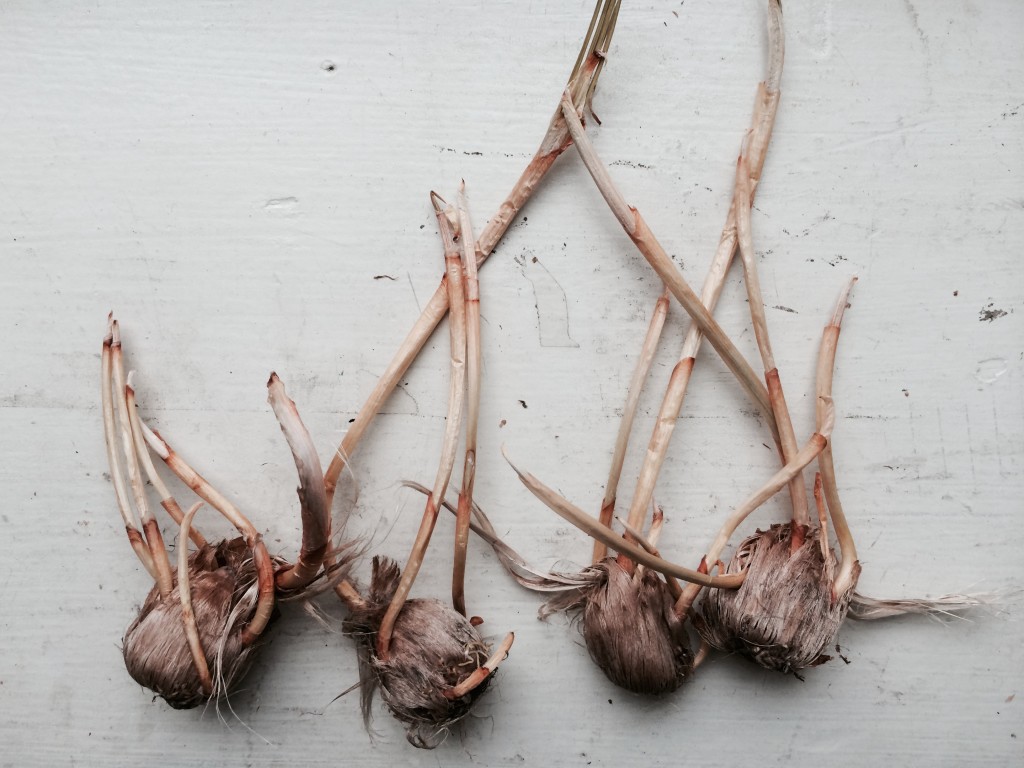
I planted them in my dwarf apple tree pots and put down bird netting over the soil to keep the squirrels away. The bulbs seemed quite dry and light (weight-wise), so I’m hoping that they are still viable. If nothing happens with them in the next couple of months, I may buy another batch. I read that you plant them in late summer, so I still have plenty of time if these are duds. I’m not really sure why they specify planting them in late summer as you leave them in the ground all year. I didn’t want to wait any longer with mine as they seemed quite dry already.

I am very excited to try my hand at growing it. I’ll post pictures when they start sprouting.

Crocus Sativus

IMG_1318This past New Year’s, we had friends over who made the most delicious paella dish. Since then, I’ve been thinking about saffron. It is a very expensive spice that is made of the dried stigmas of a particular crocus. I started to wonder what kind of crocus produced the right stigmas, and if I could grow it in my climate.

It turns out that the correct crocus is the Crocus sativus. It looks a lot like the regular purple ones that are popping up right now in the early Spring. The sativus crocus blooms in the Fall instead. After peeking at quite a few sites on the internet, I realized that I could grow these crocus bulbs right here in Brooklyn. Very exciting!

I ordered 10 bulbs from Marde Ross & Co. I’ve had to wait a bit because of our hard winter, but I’m planning on planting them in the big pots that hold my dwarf apple trees. I need to rig a netting barrier to prevent the squirrels from digging up these fairly expensive bulbs.

The first season, I’m told not to expect many blooms. Each year the plants multiply and produce more flowers. It will be fun to try my hand at saffron production.


Lined Curtains

IMG_1243Do you ever have a moment where you see something (a room in your home, your wardrobe, your hair, whatever) and you think, “I can’t live with that another second”? I’ve been having a lot of those moments lately, however this post will be on one of the things I actually changed.

Last week I decided that I couldn’t look at the hideous curtains in my office another day. I’ll show you a photo of the old ones in a second and you will laugh your head off and wonder why those ever made it up on my window in the first place.

The home office that I share with my husband is crammed full of stuff. Photo gear, computers, open shelving (why oh why?), so I knew I wanted a simple curtain that wouldn’t add to the visual noise of the room. Yes, you could argue that a bold color/pattern might draw the eye to the curtain and away from the hoarder’s den, but I decided to stay with a neutral color.

In my neighborhood, we have a weird fabric store. It is stocked with hundreds of bolts of hideous fabric, with a few bolts of cotton and linen hidden here and there. It is insanely cheap, and is where I got the linen to make the napkins this winter. I decided that I would go into Manhattan and visit some of the gorgeous fabric stores like B&J fabrics and Mood.

I knew I needed 5 yards of fabric and wanted to line them. We put guests in our office, and the streetlights can be pretty bright if you don’t have decent curtains. I found a tutorial on making lined curtains, so off I went to shop. I browsed and browsed the amazing fabrics at these shops. Liberty of London, gorgeous Japanese cottons, stunning linens. But I came to realize that 5 yards of fabric that was $35/yard was not in the price range I wanted. So I headed over to my little ghetto fabric shop in Brooklyn.

I found a pretty neutral linen that the guy gave to me for $4/yard and a white cotton that he gave me for $3/yard.

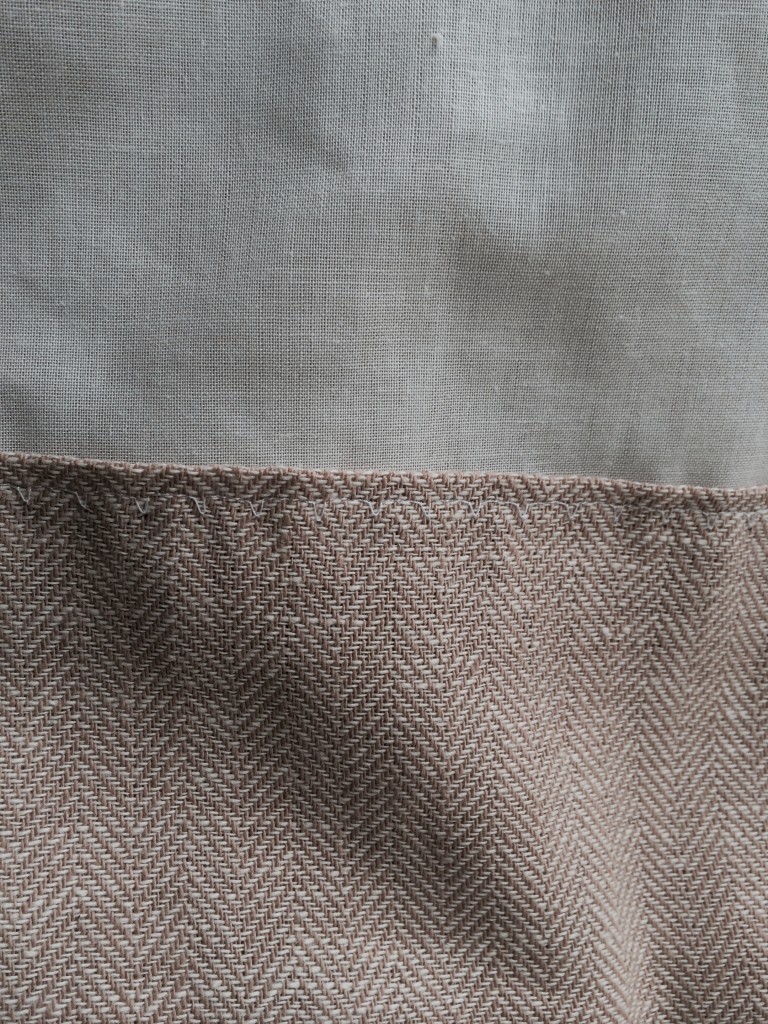
I sewed up the curtains and figured out how to make a blind hem. Tutorial here.IMG_1244 This is the back where you can see the stitching. The little downward jog is where the needle picks up a tiny bit of fabric on the front side. You get a tiny stitch every so often, instead of a straight row of stitches that run all the way across the bottom.IMG_1245Here’s the front of the panel. You can see a horizontal crease, but no stitches. I think I could get rid of that crease if I pulled out a steamer and really got serious.

IMG_1246I think they  turned out really well. Not bad for $35, eh?

And now for the photo of the old curtains. I honestly don’t know what possessed me to make these in the first place. I think I was looking for a fabric thick enough that it would block the light, but red velvet?? Seriously?

Tree Support

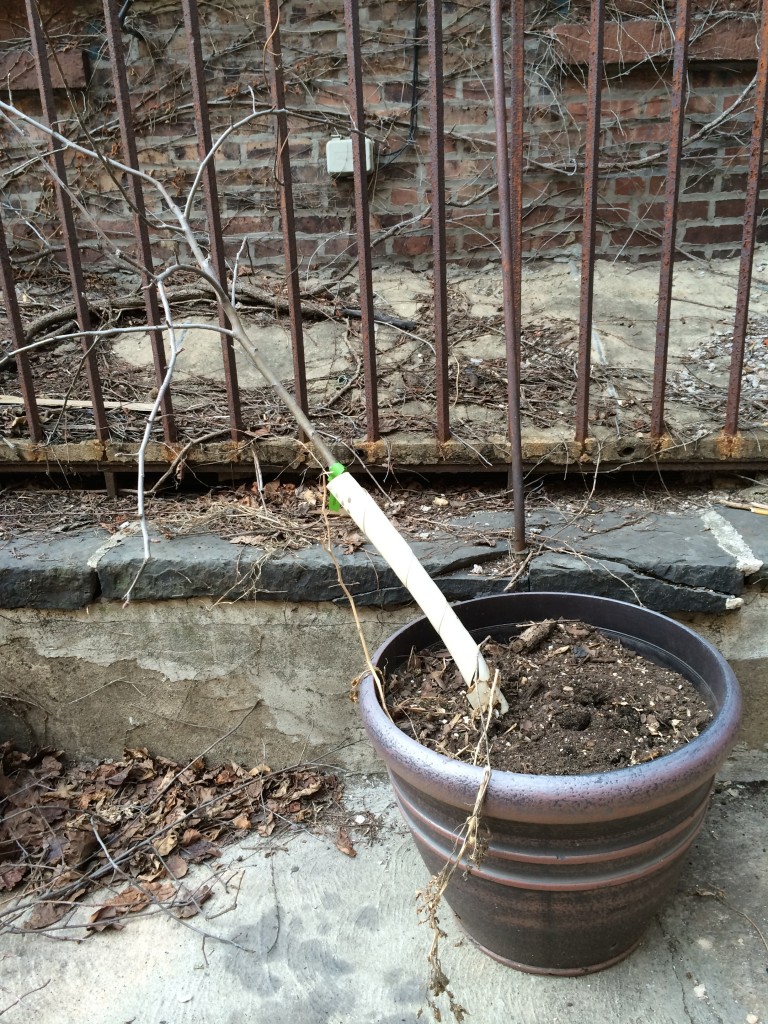
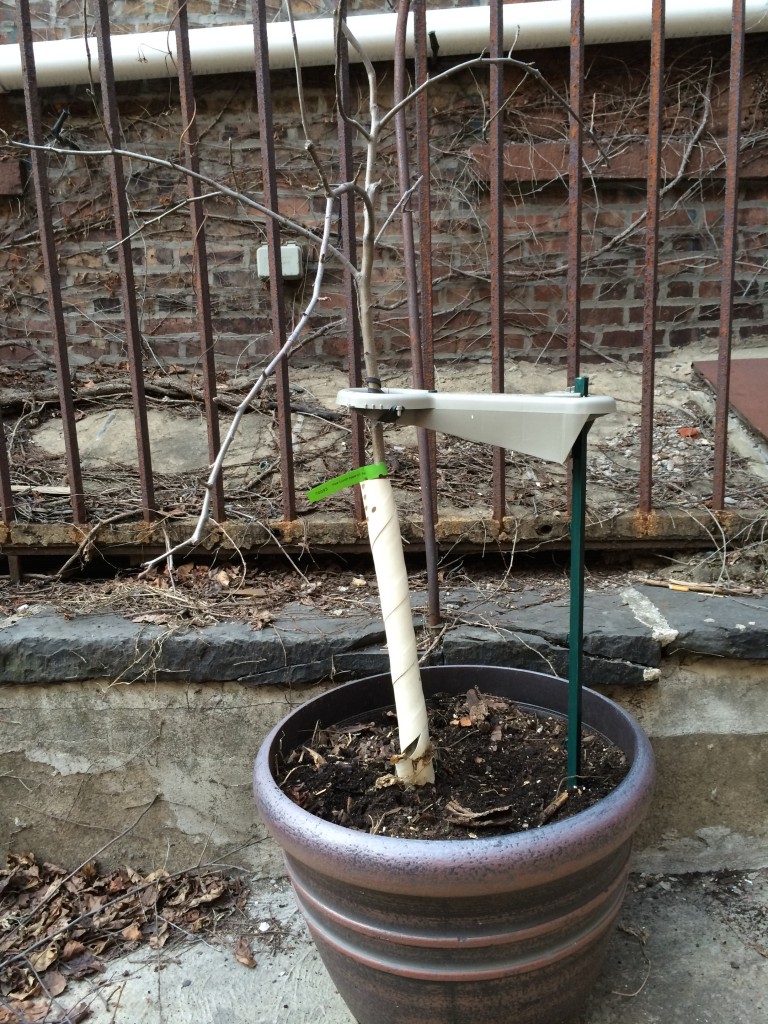
IMG_1176 For some reason I never bought a support for this little apple tree. I have one for the other one, but somehow never got around to getting a second one. As you can see this little guy is leaning terribly. I finally decided to be a responsible adult and ordered a tree support.IMG_1177 I generally don’t promote products on this site, but I like this product. It’s called Tree*Mate*O and is the light gray piece seen in the photo above. You attach it to a u-shaped post and it has a rubber band that wraps around the tree. I’ve had one for my other tree for years and it has been supporting it well.

I attached it to my little apple tree and the tree already looks much better. The tree was leaning so far over that I didn’t want to snap it by making it completely upright in one go. So, I’m going to wait a few weeks until the tree is used to this position and then I’ll straighten it completely.

Can’t wait to see some green in the garden!


Making Miso

A few days ago I took a Miso-making workshop with Cheryl Passwater at the Horticultural Society of NY.

Making miso is not for people who need immediate gratification. The recipe basically goes like this: Cook some dried beans, mix with a few other ingredients, wait a year and then serve. That one-year waiting period makes it seriously daunting to ad lib a recipe!

A few things about miso. Miso is filled with probiotics, which makes it a very healthy food. Darker miso has more probiotics than white miso. Miso is fermented through fungal growth so it’s not a good option for people with fugal health problems like candida. The probiotics take over 6 months to develop, so even though your miso might taste right after 6 months, it won’t be as healthful as it could be until it’s first birthday. Heating miso kills off the probiotics, so salad dressings, and dips are healthier than miso soup.

I signed up for this workshop knowing very little about miso. For instance, I thought it was always made with soybeans. Not true. You can make it with pretty much any dried bean. We made a black bean miso. I’ll get back to you in a year to tell you if I like it or not. You can use dried adzuki, chick peas, soy beans, black beans, mung beans, whatever. Again, just remember that it takes a while to ferment, so maybe start slow with the experimenting.

One ingredient that you use in miso-making is koji. Koji is rice (or soybeans) that is inoculated with a mold called Aspergillus oryzae. So, yup, you are adding moldy rice. It comes dried in a bag, so it just looks like a dried grain. You can buy koji (and other miso products) from South River Miso. We used an organic brown rice koji in our workshop.

Black Bean Miso Recipe (makes 3 pint jars):

  • 1 c. dried black beans.
  • 1 c. koji
  • 4 t non-iodized salt like sea or kosher salt
  • 1T seed miso
  • 1/2 c. bean cooking liquid

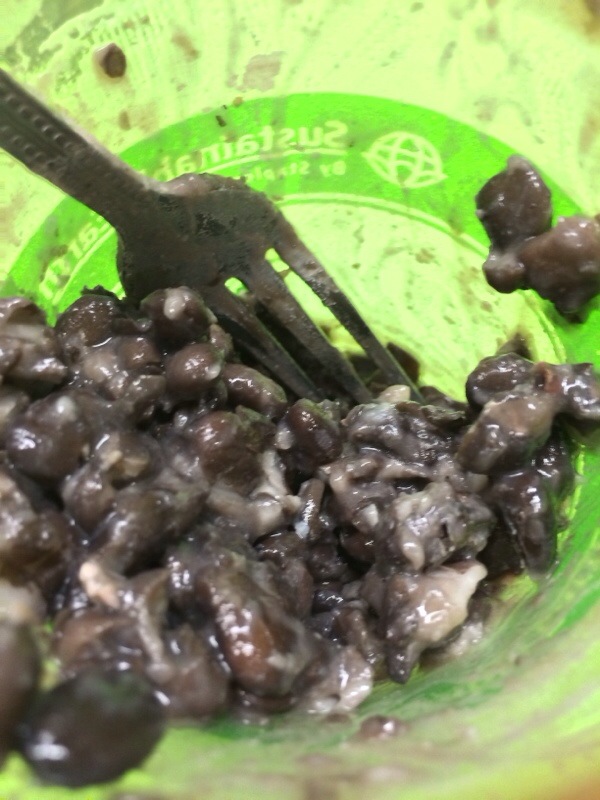
Soak beans overnight and then cook until al dente (about 45 min-1 hr). Reserve cooking liquid. When the beans and liquid are cooler than 105 F, you can begin to mix your other ingredients.20140304-104200.jpg

Mash the beans so that the skin breaks. This will allow the mold to enter each bean.

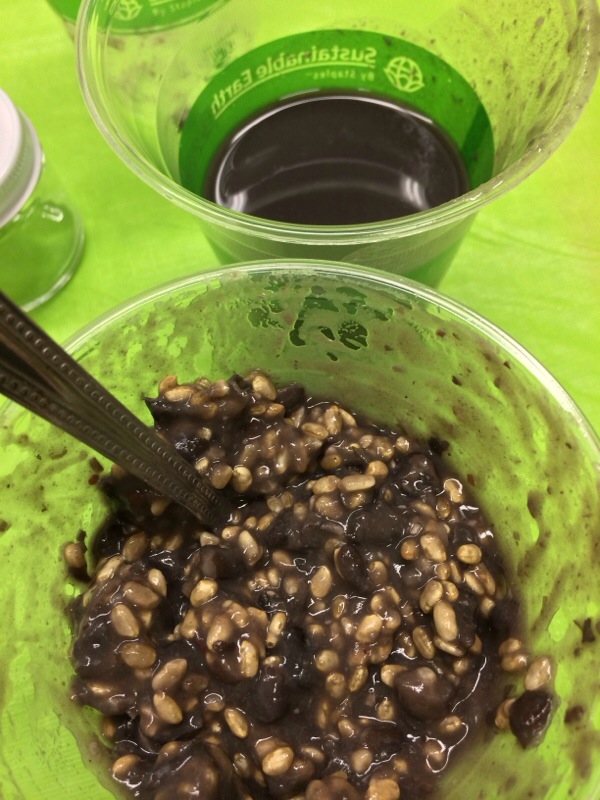
20140304-104117.jpgMix salt into the cooking liquid. Add koji and mix. Then add this to the mashed beans and mix.
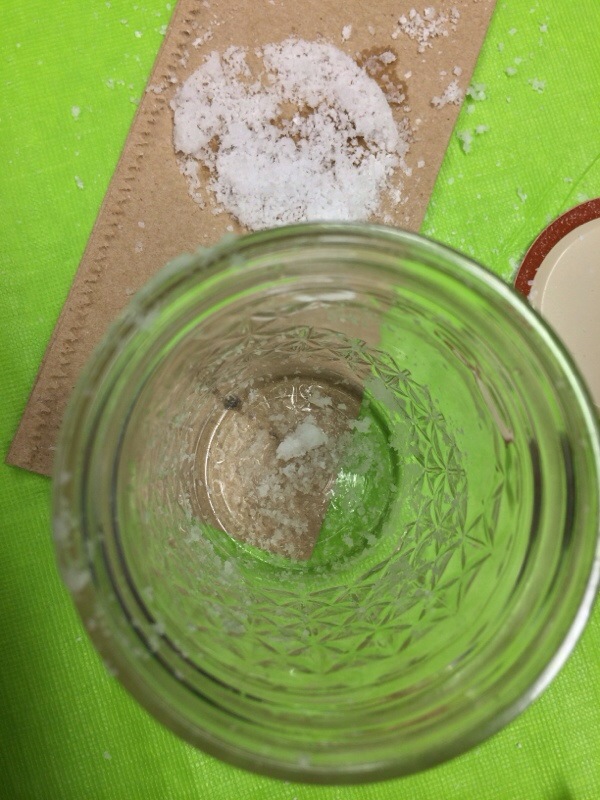
20140304-104213.jpgTake a sterilized jar and mist some water on the bottom and sides. Then sprinkle with salt to cover the insides. This was difficult, but try to have a thin coating of salt in the way you would flour a baking pan.
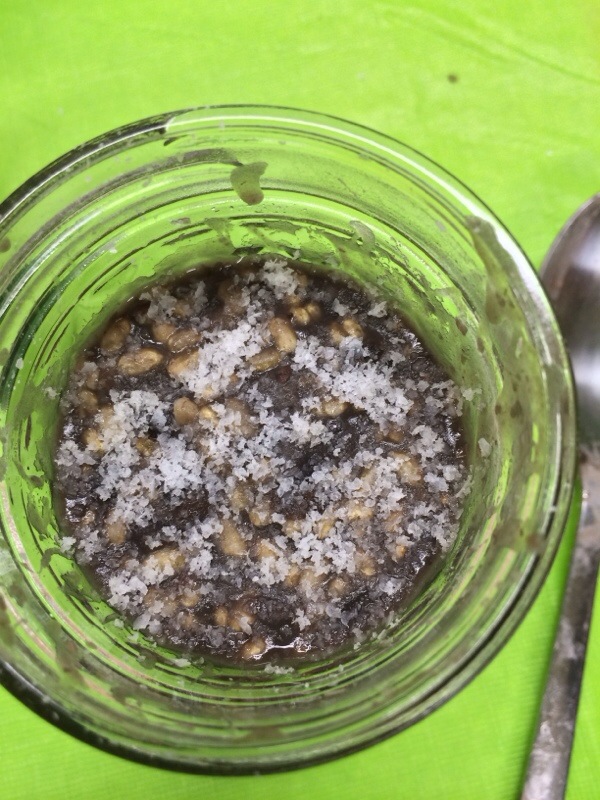
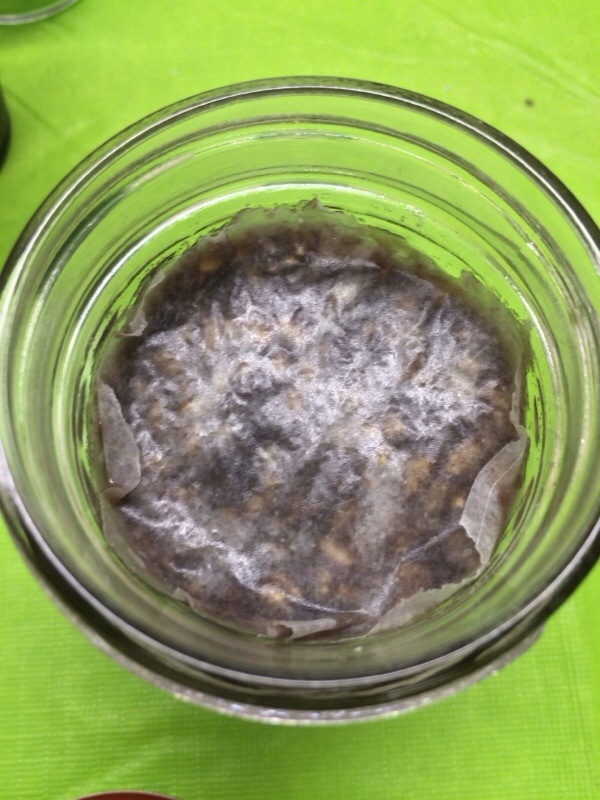
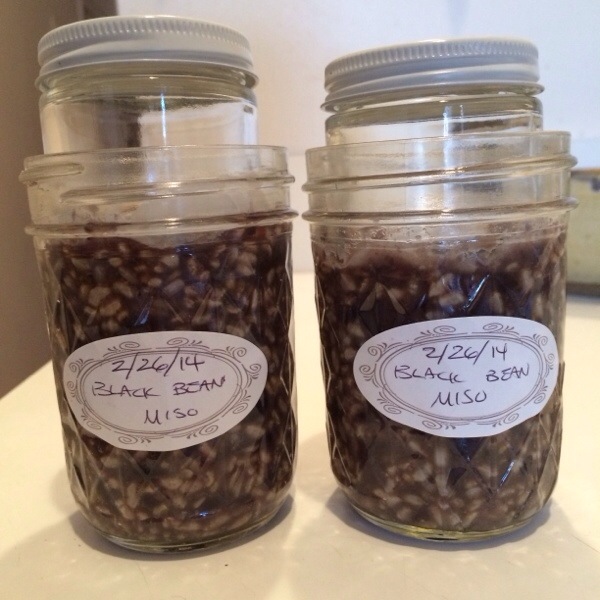
20140304-104135.jpgAdd the bean mixture, and tap to remove air pockets. Spoon in a bit at a time and tap. I used a knife around the sides to help the air escape. Sprinkle the top with a fine layer of salt.

20140304-104149.jpgCover with wax paper.

20140304-104227.jpgYou will want to weigh the wax paper down with something. For the workshop, they ordered jars that were small enough to fit into the larger jars. Don’t push down as this will make the miso mixture ooze up the sides.

20140304-104241.jpgCover with a cloth to keep dust and critters out. You don’t want to seal out air.

Now wait a year. There might be a layer at the top of the jar that doesn’t look appetizing. You can scrape that away to get to the good stuff. At this point you can decide if you want to puree your miso or keep it chunky.

I have my two jars stored in the root cellar at my in-law’s house. Good luck making miso. Let’s reconvene in a year and talk about our experiments!