Getting started: What you need to grow vegetables

The following article was on newsday.com today
by Jessica Damiano | Garden Detective

Planting your own vegetable garden can really save money. And that’s not just my opinion; the U.S. Department of Agriculture concurs, estimating that every $100 spent on vegetable gardening yields $1,000 to $1,700 worth of produce.

Expect to harvest about a half-pound of edibles from every square foot of garden, according to the National Gardening Association. That means a 15-by-15- foot garden can produce more than 100 pounds of vegetables.

Supplies: Hoes, rakes, spades, hoses and a fluorescent light kit for indoor seed starting are practically one-time purchases. When spread over their lives, their costs become negligible. Assuming you don’t buy any fancy composting bins, raised-bed kits, greenhouses, cold frames or other high-end gear, growing your own can be quite the miserly endeavor.

A $70 investment in seeds and supplies can yield, on average, a $600 return, assuming a $2-per-pound market price for produce, according to the National Gardening Association. All you really need are seeds and seed-starting mix, containers to start the seeds in (be creative and recycle yogurt containers and egg cartons), fertilizer, compost, water and mulch. It’s late in the season to be starting seeds indoors, so if you haven’t, buy nursery-grown starter plants for this year.

Time: Plan to spend 30 to 40 minutes a week tending every 100 square feet of garden. That’s about 10 minutes a day, plus time for watering.

Sun: When it comes to sun and vegetables, more is better. Locate your garden where it will receive at least six hours of full sun each day, especially if you’re growing the plant for its fruit or root. If you don’t have a site that offers full sun all day, no worries. Just stick to green leafy vegetables like lettuce, collard and mustard greens, Swiss chard, spinach and kale. Broccoli, cauliflower, peas, beans and beets can handle a little shade, too. Herbs require full sun. And always transplant seedlings outdoors on a cloudy day.

Soil: Before you do anything else, dig down 4 to 6 inches into your planting bed and scoop up a cupful of soil for a pH test. You can do this yourself with a store-bought test kit or you can bring a sample to your county Cornell Cooperative Extension office, where they’ll test it and provide specific instructions on raising or lowering the pH and give suggestions for improving the soil. The optimum pH level for vegetables is between 6.2 and 6.8. For herbs, it’s 7.0.

Next, clear the bed of weeds and enrich the soil. Add lime or sulfur if indicated by your pH test results (lime raises alkalinity, sulfur reduces it). Spread 4 inches of compost – the best organic matter available – on top of the soil and till it 6 to 8 inches deep.

If you’re planting in a newly created bed, incorporate 3 pounds of 5-10-5 or 10-10-10 slow-release fertilizer per 100 square feet. If you’re using the same bed you planted in (and fertilized) last year, mix in 2 pounds per 100 square feet. Herbs generally don’t need fertilizer.

Space: Vegetables planted in wide rows perform and produce much better than those that are crowded together. Ideally, rows should run north to south for best sun exposure, but don’t sweat it if that isn’t possible. Transplant starter plants or seedlings exactly as deep as they were growing in their pots. Only tomatoes can, and in fact, should, be planted deeper; they send out roots from the buried portion of their stems that actually make for sturdier plants.

Mulch: Even though it makes the garden look nice and tidy, mulch isn’t purely decorative. Its real purpose is to discourage weeds, maintain even soil temperature and retain moisture. Apply 2-3 inches around plants. Consider shredded bark, wood chips, salt hay or black plastic sheeting.

Water: Most vegetable plants require one inch of water per week. Set an empty tuna or cat-food can into the garden to catch and measure rainfall, and gauge supplemental irrigation accordingly, timed for early mornings to avoid fungal diseases. It’s better to water very deeply once or twice a week than to water just a bit every day, which results in shallow root systems. Use soaker hoses to water the soil, not plants, as sprinklers and overhead watering can lead to fungal diseases.

Happy Earth Day

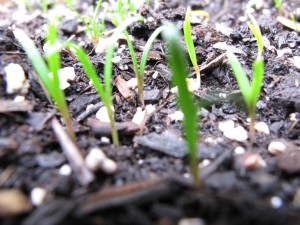
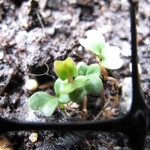
spinach sprouts

spinach sprouts


I hope everyone is having a great Earth Day and thinking about how great our little planet is and what they can do to help it out. I just bought some Marcal toilet paper, which is recycled. So far so good. Feels good not to flush trees away.

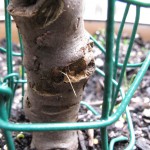
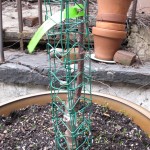
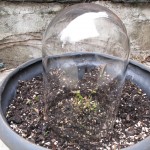
Meanwhile things are sprouting in our garden. I planted a dwarf apple tree, which the squirrels promptly chewed on. I also planted some seeds, which were dug up by the marauding squirrels. I had to take drastic measures and have now put my plants in jail to protect them. My little apple tree is starting to bud, which makes me hopeful that they will survive the damage. How do you stop these delinquent squirrels? I feel sorry for them in a city like this. They are probably just so excited to find some nice, clean soil that they go nuts. I can hardly blame them, but it still aggravates me that they choose my garden to destroy.

So here are some photos of my prison block garden. You can see some of the chomps on the trunk of the little apple tree. Yes that twig sticking out of the planter is a tree. I swear it.

The Backyard

backsteps

When I first mentioned to Neil that I wanted chickens, his initial response wasn’t very positive. He grew up in the Berkshires and sometimes the farm aesthetic was pretty awful. We have a small yard, so any chicken coop we got (I was working on him!) had to be attractive. We spent way too much money on the Eglu by Omlet. It’s a beautiful coop and very easy to clean, which was a big bonus for me.

So everything was going well in our beautiful backyard farm until I took a couple of composting classes at the Brooklyn Botanic Garden. The teacher was great and very inspiring as to how to scavenge materials in the city. Coffee grounds from your local coffee shop, bales of straw from neighbor’s Halloween displays, etc. It was armed with the information from this class that I purchased a Toro leaf blower and decided to vacuum and mulch my leaves. It actually took a lot of restraint not to become the crazy leaf lady and walk up and down my block vacuuming up the neighbor’s leaves. Hey, I only have a finite amount of “browns” for my compost bin!

Well then I happened upon an autumnal display (this was in October) that had bales of straw and quickly asked them if I could have the straw when they were done with it. I was able to cart off 2 bales. Those suckers are big and heavy and you definitely look like the crazy straw lady when you are wrestling them down the streets of Brooklyn on a cart. I generously spread a layer all over the backyard and piled the straw up in the plant beds. I was glowing with how the straw would break down by the springtime and help my crummy lifeless soil become rich with nutrients and life. Neil was skeptical, but has gotten used to my crazy schemes, so he didn’t grumble too much.

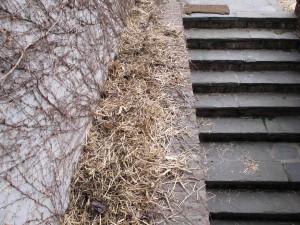
It is now spring and as you can see from the photos, I have plenty of straw on the ground and in the beds. It has shown very little signs of breaking down. The grumbling has gotten quite audible. I planted grass seeds and there are tiny little green hairs peeking up. Hasn’t shown any sign of covering up the straw.

backyard

Even I have to admit that my fabulous composting endeavor looks pretty awful. People who come over think that the straw is for the chickens and this is exactly what Neil wanted to avoid in the first place. Neil encouraged me to pull out the leaf blower to suck up some of the straw and grind it into smaller pieces. That seemed to work, but I didn’t put it all back. I think I will dig it into the beds over the summer and fall and add it to my compost bin. I think the grass will grow through what’s left and my backyard will look a little less like photos from the Dust bowl fairly soon. Cross your fingers!

Native Plant Species

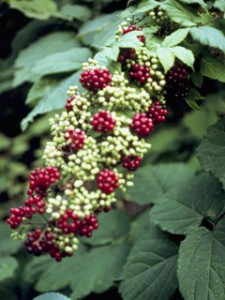
bristly sarsaparilla

bristly sarsaparilla


The Lady Bird Johnson Wildflower Center at the University of Texas has a really great website that helps you find recommended species of native plants for your area. You select your state and then you can narrow your search by adding your light requirements, soil moisture and the types of plants you want (shrubs, trees, annuals, etc.) You can even select bloom times and colors. They even have a suppliers directory so you can find plant nurseries in your area. The Gowanus Nursery is located near me in Brooklyn and also has a nice searchable database. You can even look up native edibles!!

CowPots

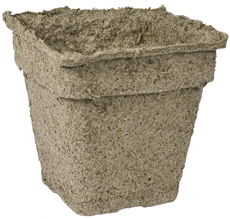
Seed Starter Pot made from composted cow manure

Seed Starter Pot made from composted cow manure

These little seedling pots were created by CT dairy farmers as an ingenious way to recycle their cow manure. Read more about them here.

You plant your seedlings in their pots. The roots of the seedlings easily grow through the sides of the pots and are able to be planted directly into the ground, saving them the stress of transplanting. The CowPots break down in the garden soil, but last up to 16 weeks above the soil. This gives the plants plenty of time to grow.

Working Toward Guidelines for a Truly Green Garden

There’s a very interesting article in the Washington Post today that talks about gardeners who are trying to be green by converting their lawns and other non-native plantings to more ecologically sustainable gardens.

In the way that buildings can be certified as ecologically friendly, the Sustainable Sites Initiative is working to set guidelines for landscaping. Click on their link to see some case studies.

What can you do to make your lawn or garden more “green”?

* You can add rain barrels, or other ways of recycling rain for irrigation.

*You can plant native plants that thrive in your climate and don’t need much in the way of fertilizer or watering.

*You can compost your kitchen and yard waste to enrich the soil instead of using chemical fertilizers.