I’ve been reading my daughter the Little House on the Prairie books lately. What amazes me when I’m reading them is how many different skills people had back then. They raised animals, they built houses out of trees, they gathered honey from hollow trees, they made cheese, soap, maple syrup, beds, clothes, you name it. It seemed as though there was almost nothing they couldn’t do to meet their needs. It seems now that there is almost nothing we can do to meet our needs. Okay, computers, heat, cars and all of that are fantastic inventions, but we’ve become so specialized that things that a child could do during Laura Ingalls’ time seem exotic to us now.
Take cheese making for instance. How many people know how to make their own cheese? Maybe there isn’t enough incentive now that wonderful, artesian cheeses are available in every decent-sized town. We have a great cheese shop in our neighborhood called Stinky. But I digress.
Almost a year ago I started to read up on making cheese. I found the New England Cheese Making Supply Company online and promptly ordered a cheese making kit. They teach you how to make fresh mozzarella in 30 minutes. I tried it and it was delicious. I decided to try yogurt and discovered this site. He errs on the side of caution with heating the milk up, but I decided I would try his method and then I could always scale things back when I was more comfortable with the process.
So let’s make yogurt!
You will need:
1 gallon of milk
1 8oz. container of yogurt that’s unopened
powdered milk (optional)
a big stock pot
enough jars (mason, spaghetti sauce) to hold the gallon + of milk
cooler
• First you want to steam the jars you will be using for about 10 minutes to sterilize them.
• Add a gallon of milk (not ultra pasteurized!) to a big stock pot (with a heavy bottom). You can make your yogurt full fat or lowfat by choosing what kind of milk you use. You can add 4 T of powdered milk to make a thicker yogurt.
• Heat the milk slowly until it reaches about 185-195ºF.
• Place the covered pot in a pan of cold water to cool it down. Again, some people skip these first steps, but this kills any pathogenic (euw!) bacteria that may be hanging around.
• When the milk cools to 122-130ºF, remove it from the cold water bath. Pour 1 cup of the milk into a 2-cup measure.
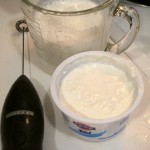
• Add 1 cup of fresh yogurt until mixture is well-blended.
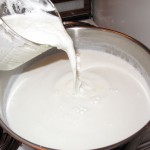
• Slowly add your yogurt/milk mixture into the rest of the milk and mix well.
• Pour milk mixture into the sterilized jars and cover immediately. One of your jars can be an 8oz. jar that will serve as the fresh yogurt for your next batch.
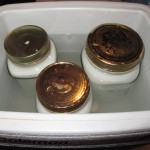
• Add water that is about 122-130ºF to the cooler. Set the jars in the cooler. The water should be below the level of the lids. Let the jars sit undisturbed for at least 3 hours. If you don’t have a cooler, you can wrap the jars in towels and keep in a warm spot.
Your unopened jars will keep for up to 2 months in the fridge, so you have plenty of time to enjoy this delicious yogurt.
-

-
Steam the jars and lids
-
-
Heat milk to 85-90 C (185-195 F)
-
-
Add fresh yogurt to scalded and cooled milk
-
-
Add yogurt/milk mix to rest of milk
-
-
Keep jars in 50 C water for at least 3 hours
-
-
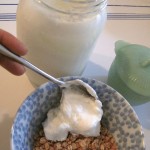
Enjoy!
